How To Use The MySirenum Mobile Application
While working for Crewit Resourcing, you may be required to download the MySirenum app. The app allows you to check-in and check-out for shifts, receive offers for potential jobs, indicate your availability and more. The application is free to download and available on both Android and iPhones. This guide gives an overview of how to use the app.
Installing the App
MySirenum is available on the Google Play Store and the Apple App Store.

You can install the app by navigating to their preferred store and searching for ‘MySirenum’ and then pressing the download button. MySirenum is developed by Sirenum Ltd.
Once the app has downloaded, you can run it by tapping on the app icon from your home screen.
Download for Android | Download for iPhone
New Users- Registering / Signing Up
The main menu contains a blue button entitled, ‘Sign Up’.
If you have already registered with Crewit Resourcing you can use this button to obtain access.
When you press the ‘Sign Up’ button, just enter your email address, press the confirmation button and then check your email for further instructions.
Please note: You must use the same email that you registered with Crewit Resourcing.
Existing Users- Logging In
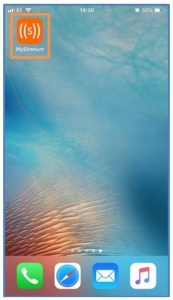
To log in, open the app on your phone by tapping on the MySirenum icon.
Then, enter your username and password and press ‘Log In’.
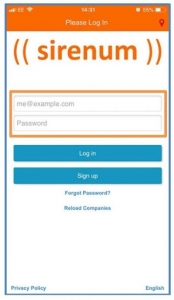
If this is your first time using the app (and you have been authorised to use it), this will start the first login process.
If you experience any login issues, please contact your Crewit Resourcing office.
Forgot Password
If you have forgotten your MySirenum password, click Forgot Password on the sign in screen. You will be asked for your email address. Enter your email address and click Submit.
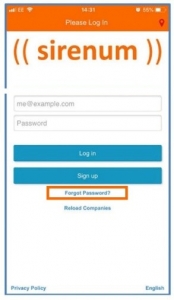
If the email address is associated with an account, you will receive an email with a link to reset your password.
Home Screen
When you log into the app, the first screen you will see is the home screen.
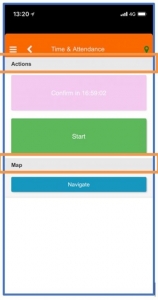
The home screen may differ in appearance depending on your schedule, however, it is split into two main sections. The first section is ‘Actions’ and the second section is ‘Map’.
Actions
The actions section will allow you to perform different contextual actions.
For example, if you are on site and ready to start a shift, you can press the green ‘Start’ button to start your shift.
The main contextual actions are ‘Confirm’ and ‘Start’.
Confirm
If you have been assigned a shift by Crewit Resourcing, you will have to confirm your attendance using the MySirenum app.
Unless Crewit Resourcing informs you otherwise, the ‘Confirm’ button will only become available two (2) hours prior to the shift commencing.
To confirm your shift, tap the purple ‘Confirm’ button.
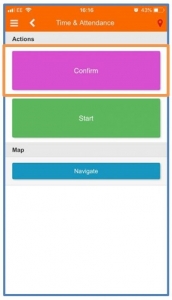
Once you have confirmed your shift, you will receive a pop-up message and Crewit Resourcing will receive a separate notification that you have confirmed your attendance.

Start
When you are on-site and ready to start work, press the green ‘Start’ button.
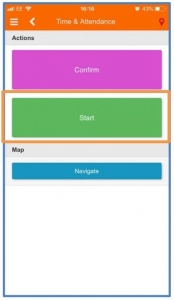
Your start time and location will be recorded by MySirenum and provided to Crewit Resourcing.
You will also receive a pop-up message on confirming that your shift has started.

After you have started your shift, you will notice two additional buttons appear. Firstly, the ‘Finish’ button and secondly, the ‘Start Break’ button.
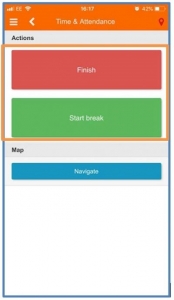
You can use the ‘Finish’ button to end your shift.
You can use the ‘Start Break’ button to start your break (remember to end your break using the ‘End Break’ button after you have started a break).
Again; all the time and location information received from pressing these buttons will be passed to Crewit Resourcing.
Map
The map section on the home screen will contain a button entitled ‘Navigate’.

You can press the ‘Navigate’ button to open a map and get directions to your next shift.
The map will show you the location of the next shift.
Press the ‘Directions’ button to start navigating to the shift location used your phones GPS.
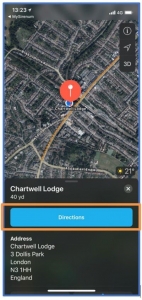
The mapping software is not part of MySirenum. The map is your default phone mapping app (e.g Google Maps).
GPS must be enabled on your phone for this feature to function correctly.
Shifts Menu
The shifts menu allows you to view your schedule. For example, you can view your upcoming shifts. To access the shifts menu, select the ‘Shifts’ option from the main menu.
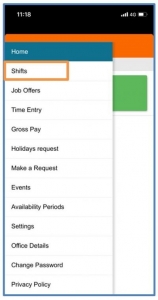
My Future Shifts
By default, the shifts menu will take you to the ‘My Future Shifts’ screen.
If you have any upcoming shifts, they will be listed here.
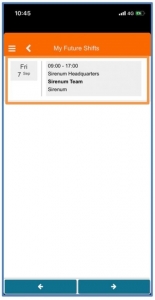
You can view additional information about the shift by tapping on it. This will show you additional information about the shift.
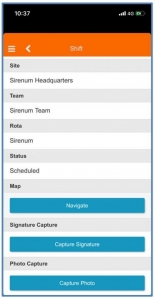
The shift additional information screen has some other options and features (Navigate, Capture Signature, Capture Photo etc), which are explained below.
Navigate
To view directions, tap on the ‘Navigate’ button which is situated in the map section.
A map of the work site will be displayed using your phones default mapping application (e.g Google Maps) and, as described earlier, you can navigate to the work site by pressing the ‘Directions’ button.
Capture Signature
Your shift supervisor may ask you to provide a signature when you attend work.
If they request this, you (or your supervisor) can tap the ‘Capture Signature’ button.
Then you can provide your signature using your phones touch screen.
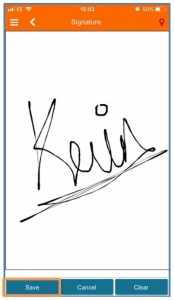
Press the ‘Save’ button to save your signature.
You will receive a notification informing you that your signature has been saved.
Crewit Resourcing or your supervisor can view your signature on their internal Sirenum computer system.
Capture Photo
If you are required to capture a photograph of your work site, you can do this by pressing the ‘Capture Photo’ button.
This will open a new screen that has two options.
The first option relates to image quality. You can specify if you want to take a high-quality image or a normal quality image. The normal quality image is the default option.
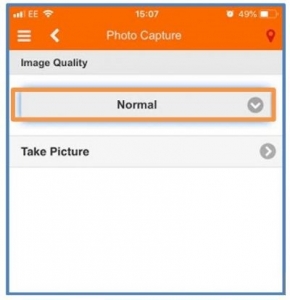
To change the quality of the image, tap on the box that says ‘Normal’ and select your desired image quality from the list.

Unless Crewit Resourcing tells you otherwise, we stick to the ‘Normal’ option.
The other available option is ‘Take Picture’. Tap the ‘Take Picture’ option to take a photograph of your work site.
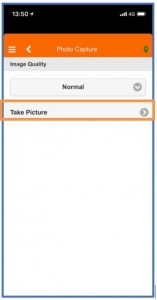
The camera will open on your phone and you may be requested to provide the MySirenum app with access to your camera.
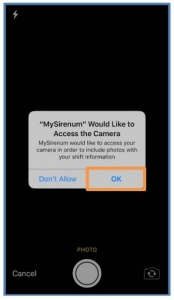
Press ‘Ok’ to provide access (If you press ‘Don’t Allow’ you will not be able to use this functionality).
Take a photograph with your phone and press ‘Use Photo’ to send the photograph to your supervisor.
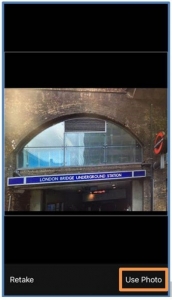
Press the ‘Retake’ button if you made a mistake and wish to take another photograph.
After you press ‘Use Photo’, you will receive a confirmation pop-up that your photograph has been sent to your supervisor.
Shifts Sub Menu
The Shifts menu contains a sub-menu with additional shift related options.
The sub-menu can be accessed by following the steps below.
First, click on the menu icon and select ‘Shifts’.
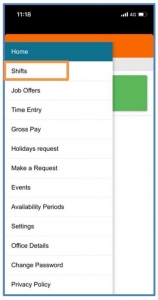
This will take you to the ‘My Future Shifts’ page.
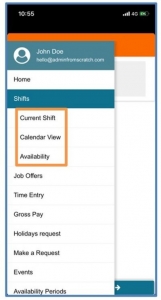
Press the menu icon again to view the sub-menu.
The sub-menu contains the ‘Current Shift’, ‘Calendar View’ and ‘Availability’ options.
Current Shift
The Current Shift option allows you to see the full details of the current shift.
Calendar View
The calendar view option shows you your schedule for the current month in a monthly calendar format.
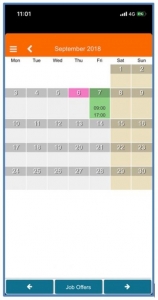
The current day is marked in pink.

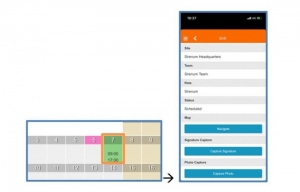
Any scheduled shifts are marked in green and the start and end times are displayed.
You can tap on the scheduled shift to see additional information.
You can change the month displayed within the calendar by tapping on one of the arrow buttons at the bottom of the screen.
If you tap on the right arrow, you will advance one month and if you tap on the left arrow you will go backwards a month.
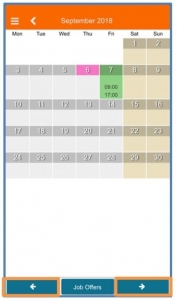
The button situated between the two arrows is the ‘Job Offers’ button.
The ‘Job Offers’ button will take you to a screen showing you any current job offers that you have.
From here, you can accept or reject job offers.
The ‘Job Offers’ screen is explained in a later section.
Availability
The ‘Availability’ menu enables you to inform Crewit Resourcing that you are either available for work or unavailable for work.
Tapping on this menu option will bring you to a screen that displays a calendar.
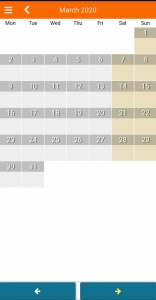
The calendar will display the current month. Today’s date will be marked in pink.
You can navigate forward and backwards through the calendar by using the arrow buttons at the bottom of the screen.
Signalling Availability
To signal your availability, simply, tap once on the date(s) that you are available for work.
The date(s) will turn green.
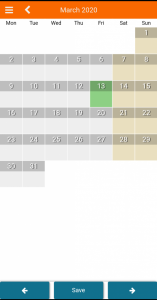
Now that a change has been made the “Save” button has become available. Press the ‘Save’ button at the bottom of the screen to confirm your changes.
Crewit Resourcing will now be able to see that you are available for work on that particular day(s).
Signalling Unavailability
To signal that you are unavailable for work, tap twice on the date(s) that you are unavailable.
The date(s) will turn red.
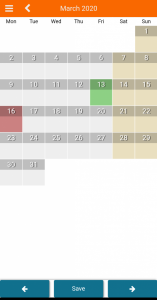
Press the ‘Save’ button at the bottom of the screen to confirm your changes.
Your consultant will now be able to see that you are unavailable for work on that particular day(s).
Job Offers
If you receive any job offers, they will be displayed in this section.
Receiving a Job Offer
If Crewit Resourcing offers you a job, it will be stored in the ‘Job Offers’ section of the mobile app.
When you get offered a job, you may also receive a notification via e-mail or via push notification on your smart device.

Email Notifications with Job Offers
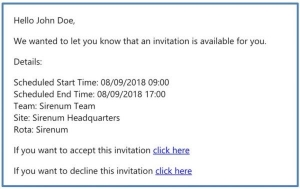
When you receive a job offer, you may also receive an email to your registered email address.
The email will provide you with information about the shift and there will be a link to either accept or reject the job.
Push Notifications with Job Offers
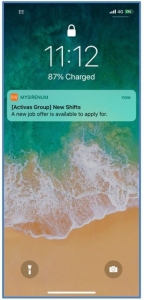
Depending on your phone settings, you may be sent a push notification on your phone.
The push notification will alert you to the fact that there is a job offer.
Smart Watch notifications with Job Offers
If you have a smartwatch, you may receive notifications on this too.
Job Offer Approval
Job offers with Crewit Resourcing are sent with a ‘Manager Approval’ basis. They are sent to multiple people and anyone who applies will be placed on a shortlist. A manager at Crewit Resourcing will look at the shortlist of applicants and pick the best person for the job. Accepting a job offer does not mean that you have the job, please wait until it is confirmed.
Viewing a Job Offer via MySirenum
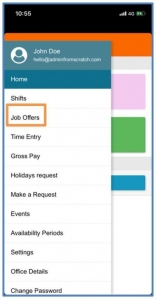
Click on the ‘Menu’.
Select ‘Job Offers’ from the list of available options.
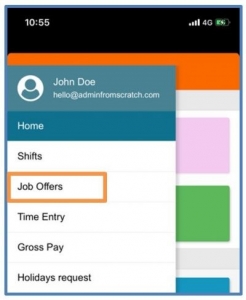
A list of pending job offers will be displayed.
If a job offer was made available to you but it has since been given to someone else, it will not be displayed in this list.

To accept or reject an offer, tap the offer and a confirmation screen will appear.

Press ‘Accept’ to accept the offer.
Press ‘Decline’ to reject the offer.
If you are unsure and want to decide later, press the ‘Cancel’ button to return back to the list of job offers and repeat the process again later if required.
Settings
The MySirenum app has a settings menu that allows you to make certain customisations to give you a personalised experience with the app.
Access settings by selecting ‘Settings’ from the main menu.
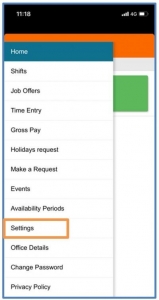
The settings menu will show a list of settings that you can customise.
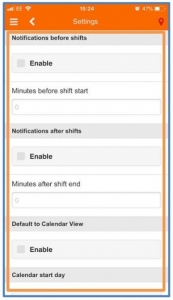
Notifications Before Shifts
The ‘Notifications Before Shifts’ function gives you a push notification before your shift starts (very handy for keeping yourself on-time!).
To enable this function, simply tap the Enable box.
You will also need to specify how soon before your shift starts that you would like to receive your push notification. Enter a numeric value (e.g 25) into the box using your phone’s keyboard.
You will now receive a reminder push notification prior to your shift starting.
Notifications After Shifts
The ‘Notifications After Shifts’ function gives you a push notification after your shift has finished.
This could be used to serve as a reminder that your shift has finished.
You will also need to specify how soon after your shift has finished that you would like to receive your push notification. Enter a numeric value (e.g 1) into the box using your phone’s keyboard.
You will now receive a reminder push notification after your shift has finished.
Default to Calendar View
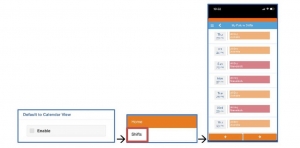
The next option in the settings menu is ‘Default to Calendar View’.
If you enable this option, the calendar view will be your default view when you select the shift option from the menu as seen in the image below.
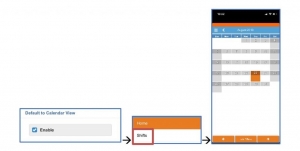
If you disable this option, the weekly, 7-day view will be your default view when you select the shift option from the menu as seen in the image below.
Calendar Start Day
The next option is the calendar start day.
The calendar start day allows you to specify which day of the week your week commences (for example, Sunday).
To change your start day, tap on the box below the ‘Calendar start day’ field and select your preferred start day.
Notification Sound
The final option is the ‘Notification Sound’.
If this option is enabled, a sound will play with each notification.
If this option is disabled, no sound will play.
Please note: Your iOS or Android mobile phone settings may override this setting. For example, if you have set your phone to ‘Do Not Disturb’, you may not receive a notification sound even if you have enabled it from within this menu.
Change Password
You can change your password from within the MySirenum app.
To achieve this, access the main menu and select the Change Password option.
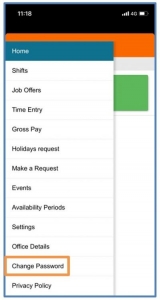
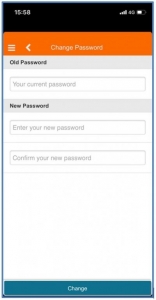
Enter your old password into the ‘Old Password’ text box.
And then enter your new password into the ‘New Password’ text boxes.
To prevent errors, note that you have to enter your new password twice.
Then press the ‘Change’ button at the bottom of the screen.
A confirmation message will confirm that the password has been changed.
If there are any problems with your password, you will receive a notification detailing the problem.
Remember, it is best practice that you do not use a password that you use elsewhere.
Getting Help with MySirenum
Have a question not covered in this guide? Get in touch with your Crewit Resourcing office and ask your contact for more advice.

